Withdrawing crypto from an exchange seems straightforward until you realize that a single mistake — wrong address, wrong network, missing memo — can result in permanent, unrecoverable loss.
Unlike a bank transfer where errors can be reversed with a phone call, blockchain transactions are final. There is no support team that can retrieve funds sent to the wrong address. No chargeback. No undo button.
This guide walks through the complete withdrawal process safely — from preparing your wallet to confirming the transaction on a blockchain explorer.
Before You Withdraw: The Preparation Checklist
Never begin a withdrawal without completing these steps first.
1. Have your receiving wallet set up and backed up
Before withdrawing from an exchange, your destination wallet must be:
- Created and configured (hardware wallet: Ledger, Trezor; software wallet: MetaMask, Phantom)
- Seed phrase written down offline and stored safely
- Tested with a small incoming transaction if it’s new
For hardware wallets: ensure firmware is updated to the latest version before use.
2. Know exactly which asset you’re withdrawing
Double-check:
- The cryptocurrency (BTC, ETH, USDT, SOL, etc.)
- Whether it’s a token on a specific network (USDT on Ethereum vs USDT on Tron are different — address format may look similar but they’re incompatible)
3. Enable all exchange security features
Your withdrawal is only as safe as your exchange account:
- 2FA enabled (authenticator app, not SMS)
- Email confirmation for withdrawals
- Withdrawal address whitelist (if not done yet)
Step-by-Step: How to Withdraw Crypto from an Exchange
Step 1: Get Your Receiving Address
Open your destination wallet and copy the receive address for the specific asset you want to receive.
Critical rules for addresses:
- Never type an address manually — always copy-paste
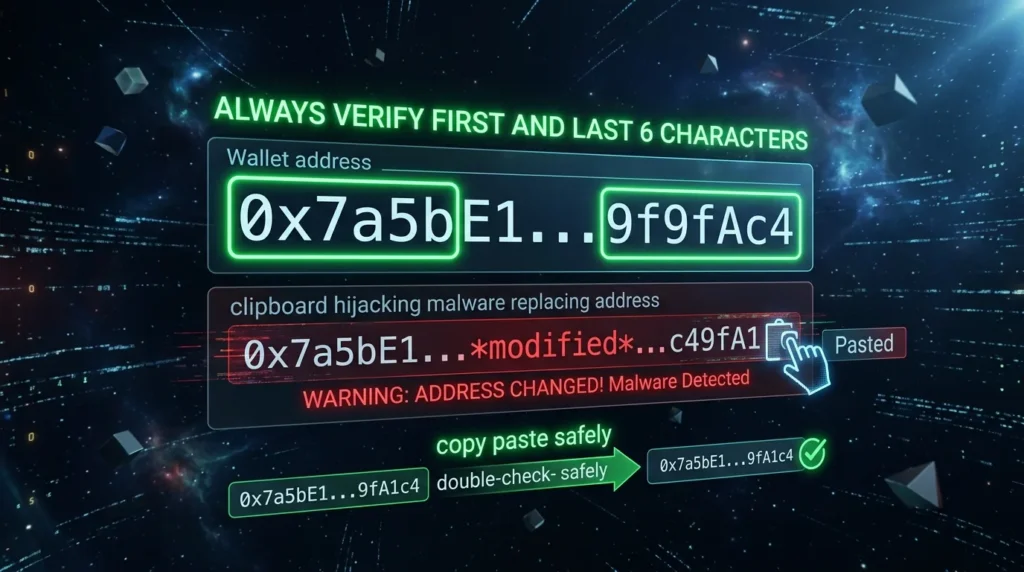
- After pasting, verify the first 5–6 characters AND the last 5–6 characters match exactly
- Never use an address from memory or from a screenshot someone sent you
- Check clipboard hijacking: some malware silently replaces copied addresses — always verify after pasting
Memo/Tag requirement (for certain assets):
XRP, XLM, Cosmos (ATOM), TON, and some other assets require a memo or tag in addition to the address. This is a secondary identifier used by exchanges. Missing or incorrect memos on these assets mean funds arrive but are not credited — they can be lost or require a lengthy manual recovery process.
Always check whether the asset you’re withdrawing requires a memo before proceeding.
Step 2: Navigate to the Withdrawal Section
On your exchange:
- Find: Wallet → Assets → Withdraw / Send / Transfer
- The exact menu varies by exchange (Coinbase: “Send”, Kraken: “Funding → Withdraw”, Binance: “Wallet → Withdraw”)
- Select the cryptocurrency you want to withdraw
Step 3: Choose the Correct Network — The Most Critical Step
This is where most costly mistakes happen.

Many cryptocurrencies exist on multiple networks. The same asset (e.g., USDT) has versions on Ethereum, Tron, BNB Chain, Solana, and others. Each version is technically a different token on a different blockchain.
Sending USDT on the wrong network:
If you withdraw USDT via Tron (TRC-20) to an address that only supports Ethereum (ERC-20) — the funds can be lost. They arrive on the blockchain but the receiving wallet doesn’t recognize them because it’s watching a different network.
Network selection rules:
- Check what network your receiving wallet uses for this asset
- Match the network on the exchange withdrawal to the network the wallet is on
- When in doubt: use the most commonly supported option for that asset
Cost vs. compatibility:
Cheaper networks (TRC-20, BEP-20, Solana) are significantly cheaper than Ethereum mainnet — but only use them if your receiving wallet supports that network. Never choose a network purely based on low fees without confirming compatibility.
Network selection for common assets:
| Asset | Common Networks | Cost Comparison |
|---|---|---|
| USDT | ERC-20, TRC-20, BEP-20, SOL | TRC-20 cheapest; ERC-20 expensive |
| USDC | ERC-20, SOL, BEP-20, ARB | SOL/BEP-20 cheapest |
| ETH | Ethereum (ERC-20) | One network — no choice |
| BTC | Bitcoin (BTC), Lightning | Standard BTC for hardware wallets |
| BNB | BNB Chain (BEP-20) | One main network |
Step 4: Enter the Withdrawal Amount
- Check the minimum withdrawal amount — exchanges set minimums, and withdrawing below the minimum returns an error
- Check the withdrawal fee — displayed before confirmation (total you receive = amount entered minus network fee)
- Consider: are you withdrawing all or part of your balance? If moving everything, confirm the minimum won’t trip you up
Step 5: Complete Security Verification
Most exchanges require multiple verification steps before processing:
- 2FA code from your authenticator app
- Email confirmation (click a link or enter a code from email)
- Some exchanges add an additional SMS code or approval step
Complete all verification steps. Do not skip any — these exist specifically to prevent unauthorized withdrawals.
Step 6: Review Everything Before Final Confirmation
Before clicking the final “Confirm” or “Submit”:
Check these items one final time:
- ✅ Correct cryptocurrency selected
- ✅ Correct network selected
- ✅ Destination address verified (first and last 6 characters)
- ✅ Memo/tag included if required
- ✅ Amount is correct
- ✅ Fee is acceptable
This review takes 30 seconds. Skipping it has cost people hundreds of thousands of dollars.
Step 7: Track the Transaction
After confirmation, the exchange provides a Transaction ID (TXID or TxHash) — a unique identifier for your transfer on the blockchain.
How to track:
- Copy the TXID
- Go to the relevant blockchain explorer:
- Bitcoin: blockchain.com or mempool.space
- Ethereum: etherscan.io
- Solana: solscan.io
- Tron: tronscan.org
- BNB Chain: bscscan.com
- Paste the TXID in the search bar
- You’ll see the transaction status, confirmations, and destination
Typical confirmation times:
- Bitcoin: 10–60 minutes (2–6 confirmations typically required)
- Ethereum: 5–15 minutes
- Solana: seconds
- Tron: 1–3 minutes
- BNB Chain: 1–5 minutes
The Test Withdrawal: Why You Should Always Do This First
Before moving large amounts anywhere for the first time, do a test withdrawal.
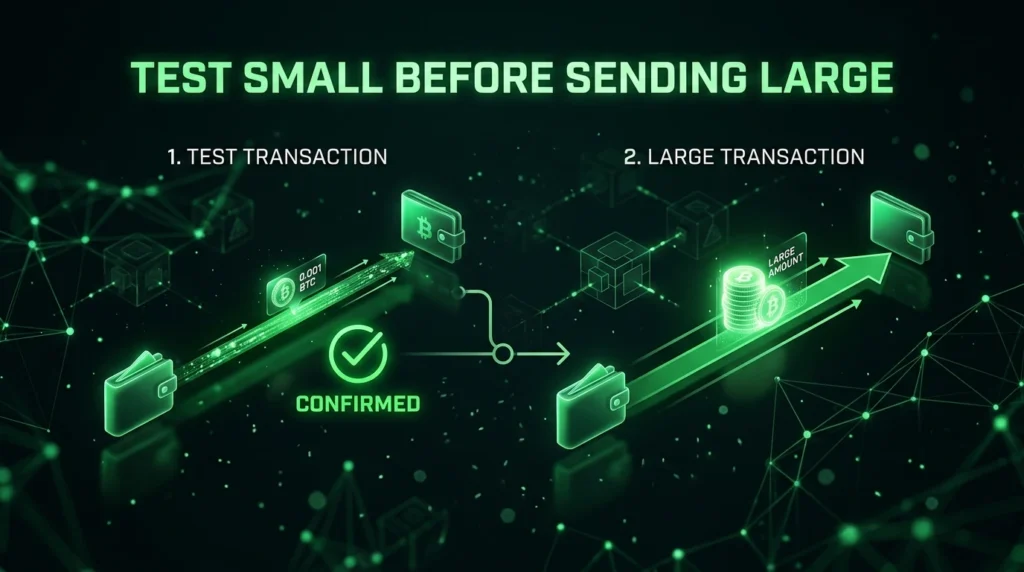
Send a small amount (e.g., the minimum or equivalent of $10–20) to the destination address first. Confirm:
- The transaction completes successfully
- The funds arrive in the correct wallet
- You can see the balance in the receiving wallet
Only after a successful test should you send larger amounts.
This step has prevented countless expensive mistakes, particularly when using a hardware wallet for the first time or sending to a new address.
Common Mistakes That Cause Lost Funds
Wrong Network
The most common cause of lost withdrawals. Sending TRC-20 USDT to an ERC-20-only address. The funds technically sent — but the receiving wallet doesn’t see them because it’s watching a different blockchain.
Recovery: Some exchanges can recover wrong-network deposits (they’ll search the address on the correct chain) — but this involves manual processing, 30–90 day wait times, and recovery fees of 10–50% of the amount. Prevention is always better.
Missing Memo/Tag
XRP, XLM, ATOM, TON require a memo. The exchange uses this to identify which account receives the funds. Without it, the receiving exchange can’t credit your account — even though the blockchain transaction succeeded.
Clipboard Hijacking Malware
Your computer copies Address A. Malware replaces it with Address B in your clipboard. You paste and send to Address B — the attacker’s wallet. Always visually verify the pasted address character by character.
Sending the Wrong Asset
Sending ETH to a Bitcoin address (or vice versa). The address formats are different, so most wallets will reject this — but not all. If the transaction goes through, recovery is nearly impossible.
Ignoring Minimum Withdrawal Amounts
If your balance is just above the minimum but the fee pushes the net amount below zero, the transaction will fail. Check both minimum and fee before entering the amount.
Withdrawing to Different Destinations
To a Hardware Wallet (Most Secure)
The recommended destination for long-term holdings.
- Open Ledger Live or Trezor Suite on your computer
- Generate a receive address for the specific asset
- Verify this address on the hardware wallet’s physical screen (important — malware can show a fake address on your computer)
- Copy the address from the hardware wallet screen, not from the computer screen
- Complete the withdrawal steps above with this verified address
To Another Exchange
When moving funds between exchanges:
- Log into the receiving exchange
- Find the deposit address for the specific asset and network
- Check if a memo/tag is required (common for XRP, XLM, etc.)
- Use this address as your withdrawal destination
To a Software Wallet (MetaMask, Phantom, etc.)
- Open the wallet and navigate to the correct network
- Copy the receive address for the asset
- Verify the network matches what you’ll be withdrawing
- Complete the withdrawal steps with address verification
Key Terminology
TXID / TxHash: Unique transaction identifier — like a tracking number for your blockchain transfer.
Network Fee / Gas: Cost paid to blockchain validators to process the transaction.
Memo / Tag / Destination Tag: Additional identifier required by some assets (XRP, XLM, ATOM) when sending to exchanges.
Blockchain Explorer: Website that shows all transactions on a blockchain — lets you track any transfer by TXID.
Address Whitelist: Pre-approved withdrawal addresses on an exchange — new addresses require a 24–48 hour waiting period before activation.
Confirmation: A block added to the blockchain after your transaction — more confirmations = more security and finality.
The Bottom Line
Crypto withdrawals are simple when done correctly and irreversible when done wrong. The checklist that protects you:
- Set up and back up your receiving wallet first
- Copy addresses — never type them
- Verify address character by character after pasting
- Match networks exactly between sending and receiving
- Include memo/tag when required
- Do a test withdrawal before large amounts
- Track with the TXID until confirmed
The 60 seconds you spend verifying is the best protection money can’t buy. 🔐
Disclaimer: This article is for informational purposes only and does not constitute financial advice. Cryptocurrency investments carry significant risk, including the potential loss of all invested capital. Always conduct your own research before making any investment decisions.